Overview
Google Sign-In is a single sign on integration now available in AmeriCommerce. This will allow your customers to quickly login using their Google account for quick and easy registration.
How Does It Work?
When a customer clicks the Sign in with Google Button, it will send them to a Google Login page. After the customer logs into their google account, it will return them to the previous AmeriCommerce page.
Ex: if the customer signs in at checkout through Google Sign-In, they will then be redirected back to the checkout after signing in.
They will also have a customer account created in the back end, and automatically be logged in. This customer account is like any others, and all functionality is still available as if they were to register the usual way by typing in all their information.
One of the best parts about this - When they return to the store if they select "Sign in with Google" they will be signed in with their Google account automatically. No credentials required. If your store already had customer using their email, a message will tell the customer to login to their account and link to Google account in their my account page.
How do I set it up?
Step 1: Set up Google API
First you need to set up APIs in your Google account.
1. Open the Google API Console Credentials page and login.
2. Click Select a project, then NEW PROJECT, and enter a name for the project. Click Create. Note: If you have an existing project, it's name may be shown for the "project" drop-down.
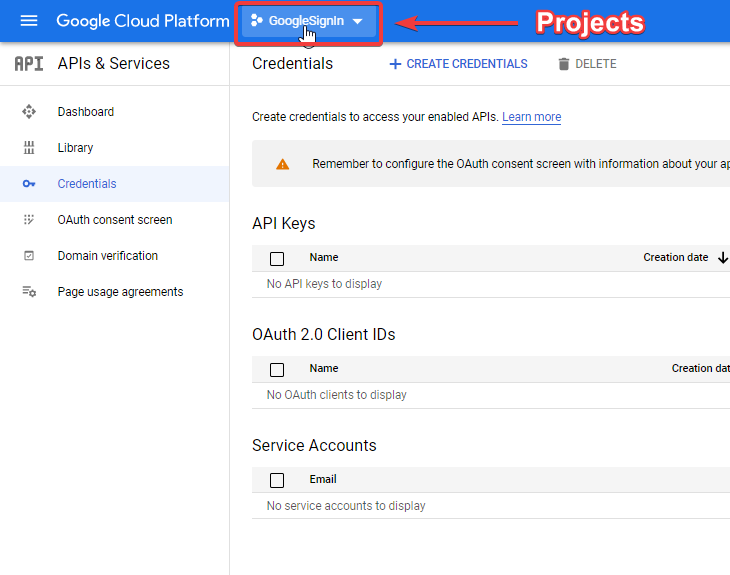
3. Click on "OAuth consent screen" Select "External" for user type, Then "Create"
4. Fill in your Application Information on the next page.
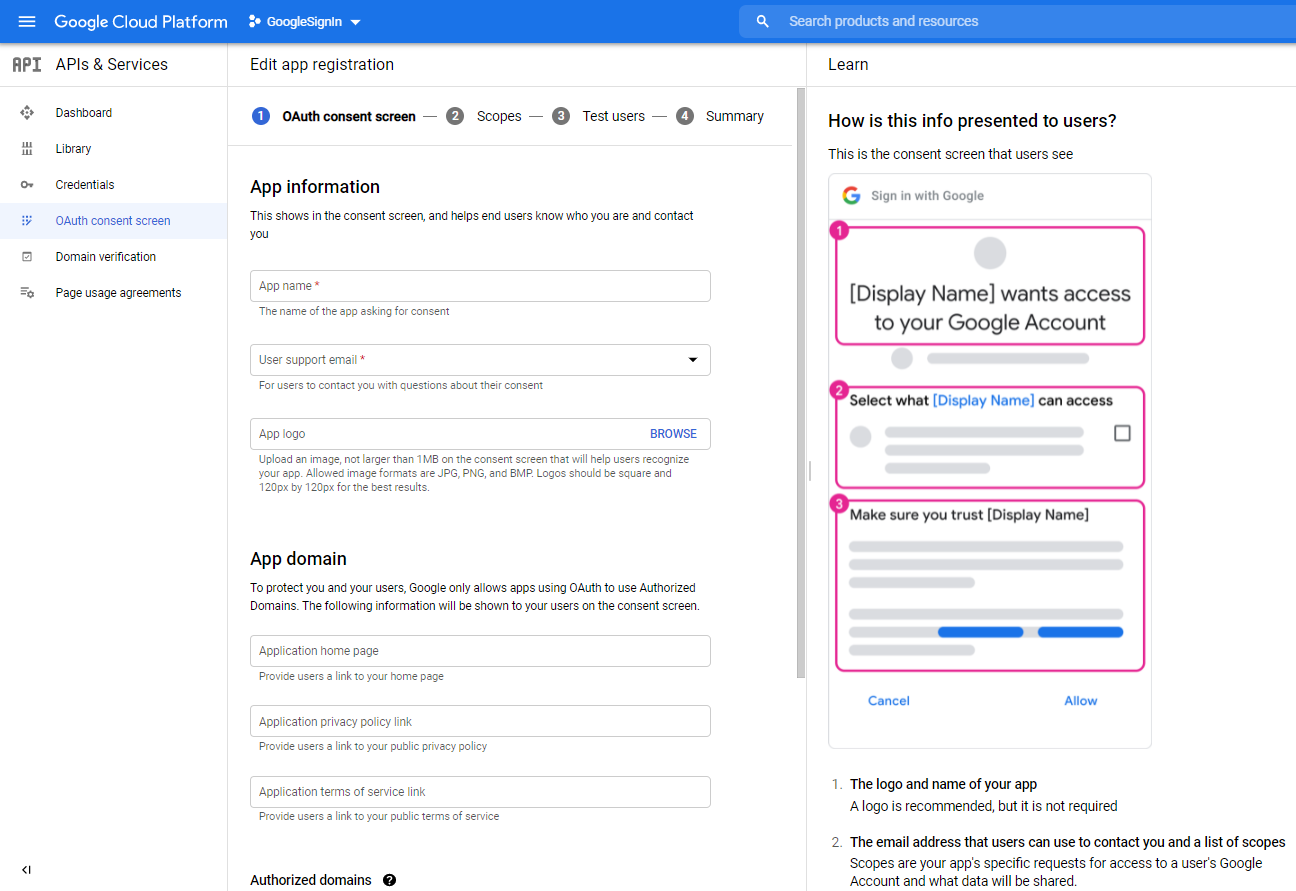
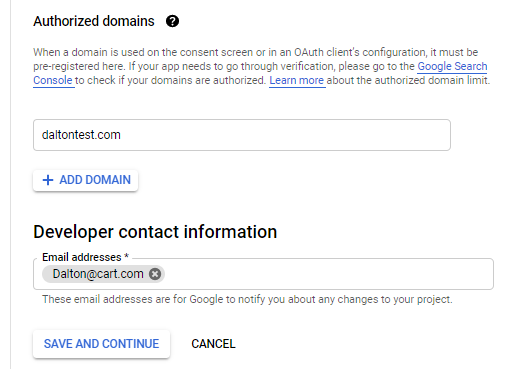
5. Add your store's domain to the authorized domains section. (Does not include subdomain)
Click on "SAVE and Continue."
6. Next, you may be prompted for Scopes. This is not necessary for Google Sign in configuration.
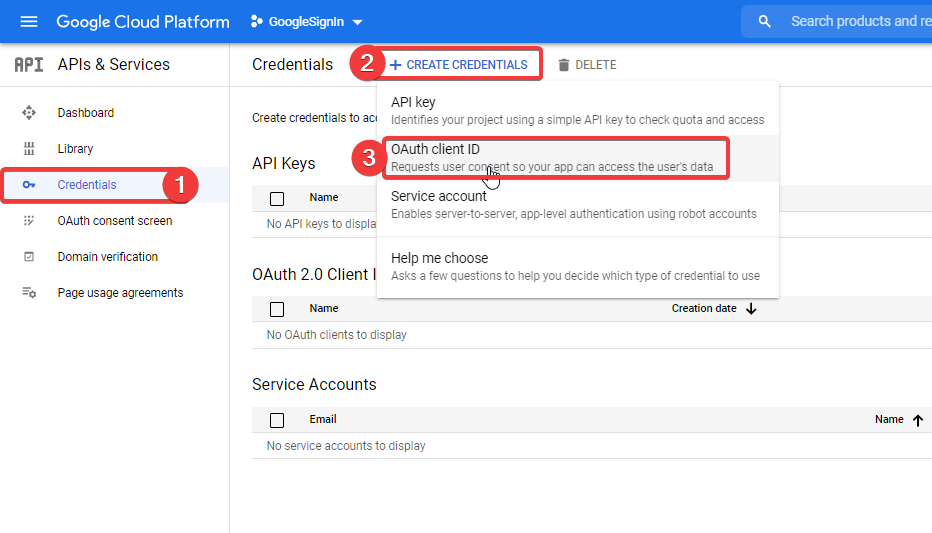
Instead, Click on "Credentials" then "create credentials", and select "OAuth client ID"
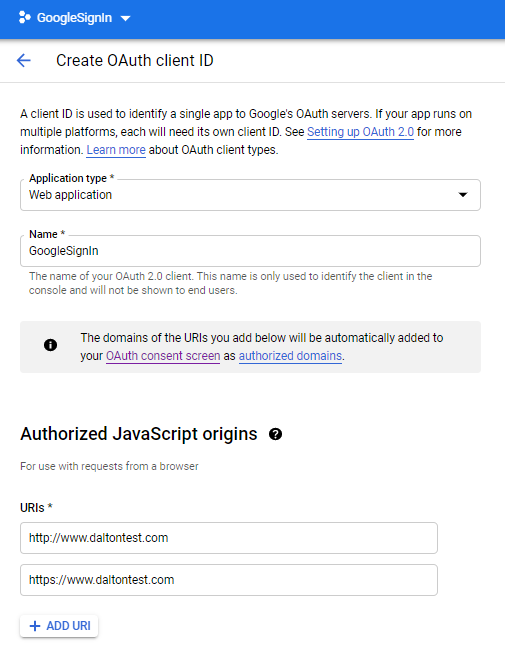
5. Select "Web Application" and fill in Name.
Add your store's domain (both http:// and https://) to the "Authorized JavaScript origins" field.
6. Click on "Create", and Copy the client ID you see in the pop-up. You will be able to copy the OAuth 2.0 client ID in the future, from the Credentials page.
Step 2: Set up in your store:
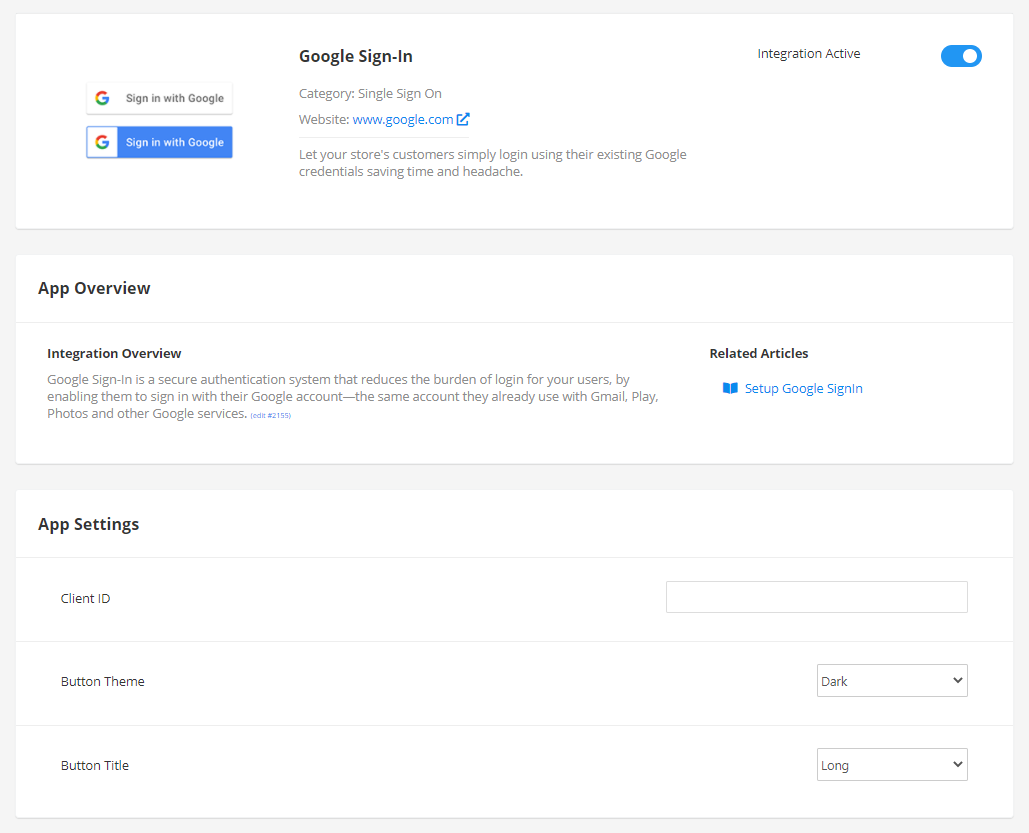
Navigate to Tools > Apps & Addons > Google Sign-In and paste in your client ID you just created. Toggle the integration active, and click save.
You can pick Button theme (dark/light) and title (long/short) you like, and Enable Google Sign-In.
Step 3: Check your Theme
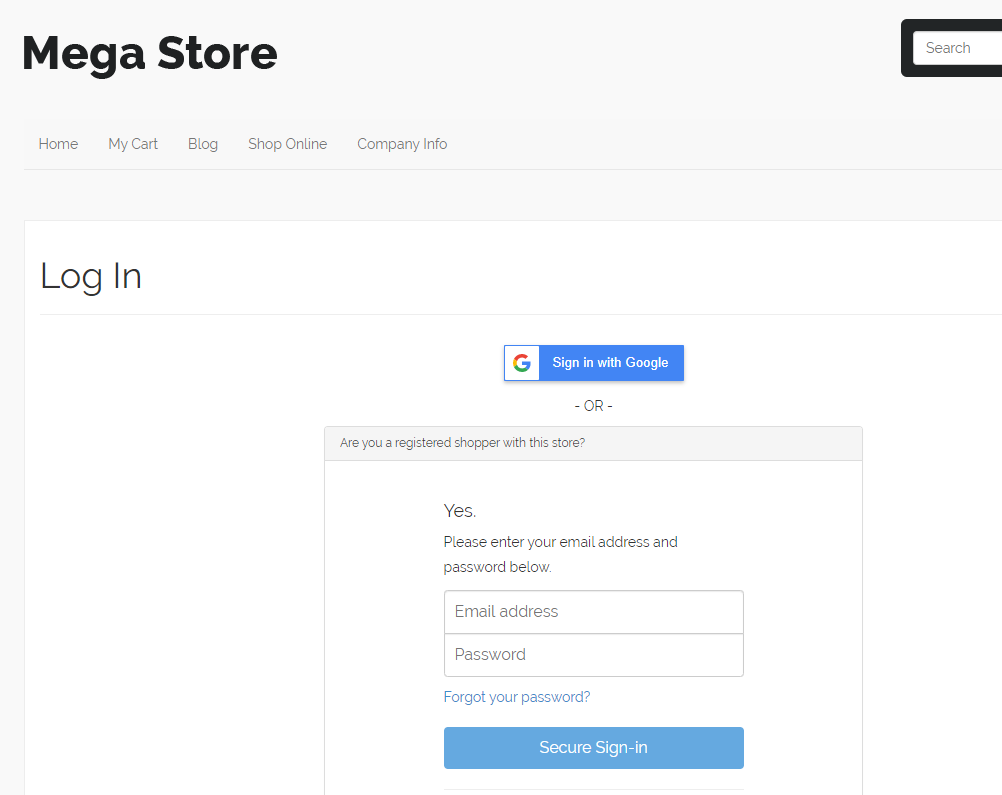
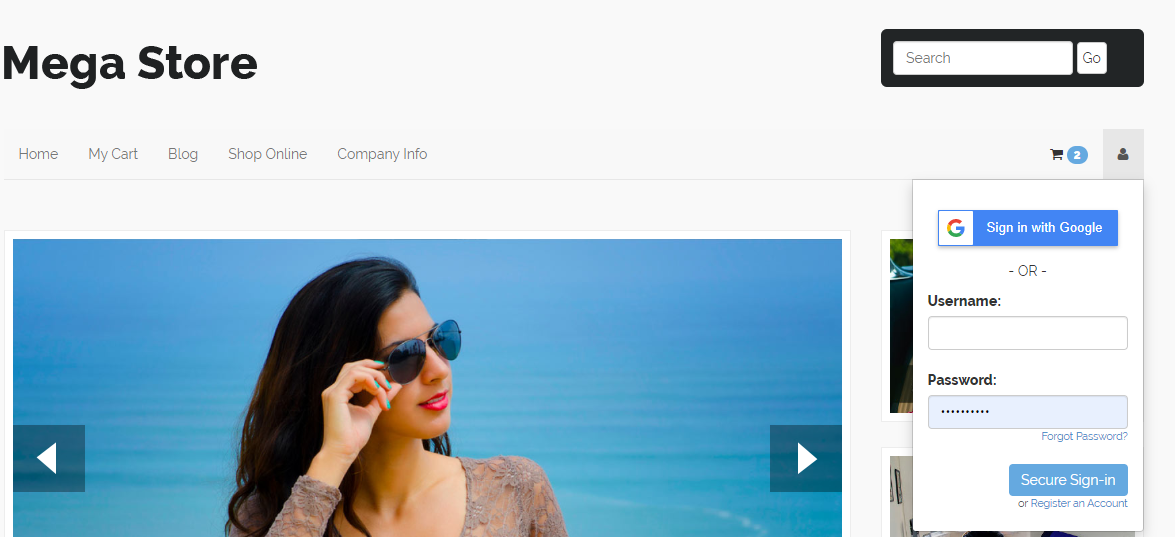
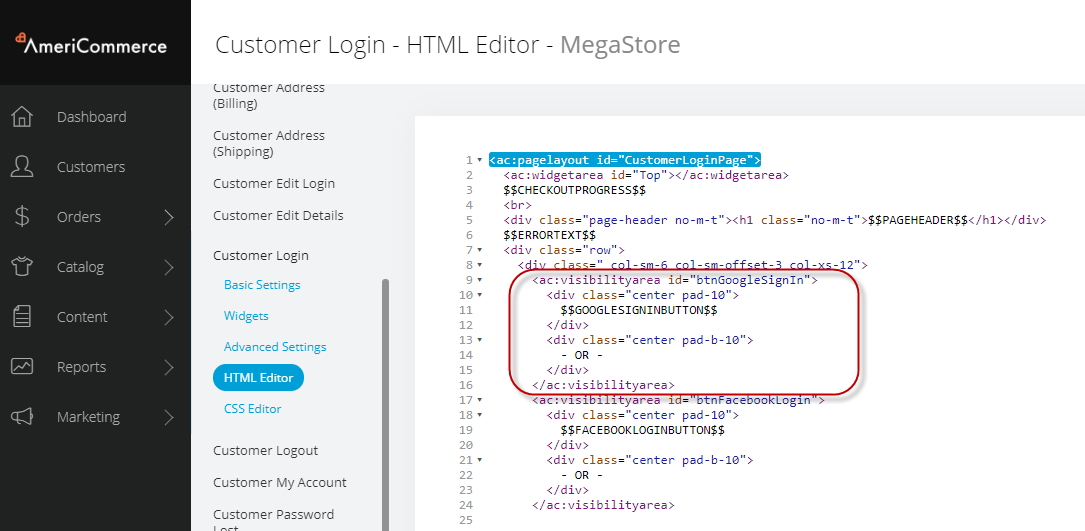
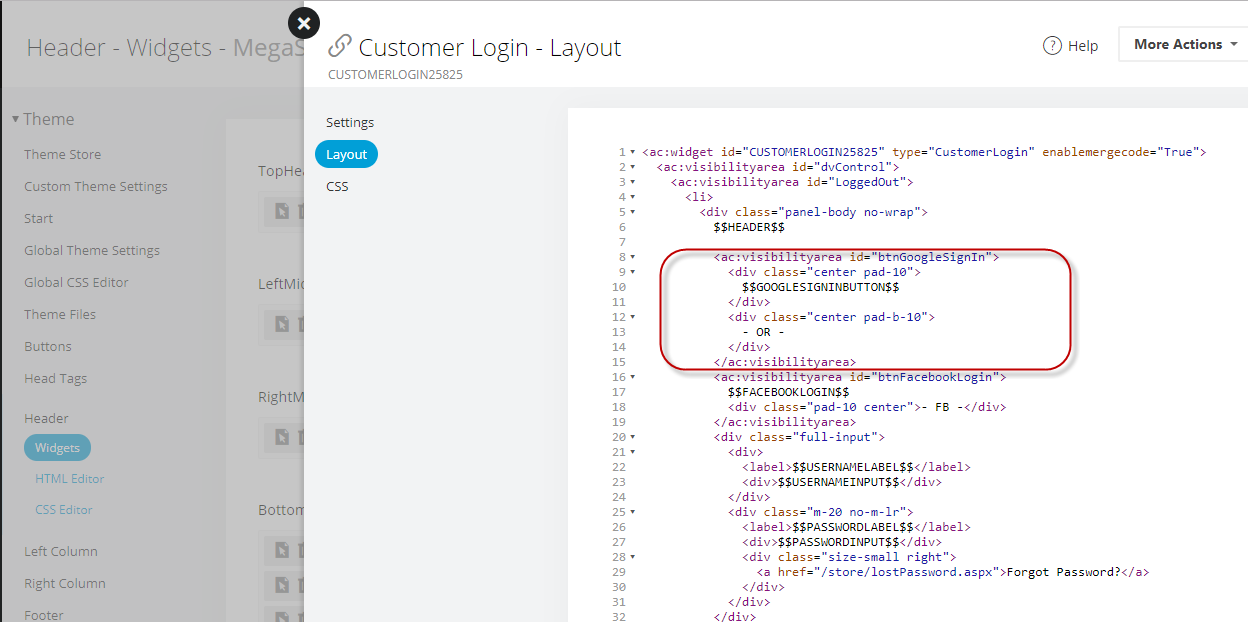
You have now completed the set up of the integration. However, depending on when you selected your theme, there may be some theme additions needed to have this display. Check your Login page and customer login widget to make sure it works on your site. If not, Follow the steps below:
For older themes or if you want to add/edit this manually, you can add this markup in your theme's customer login page and customer login widgets.
<ac:visibilityarea id="btnGoogleSignIn">
<div class="center pad-10">
$$GOOGLESIGNINBUTTON$$
</div>
<div class="center pad-b-10">
- OR -
</div>
</ac:visibilityarea>
If this is a newer theme, this CSS is already present. Otherwise, it will need to be added manually to your global css.
.g-signin2 { display: inline-block; }
Note: Theme modification involves any change to the default values in the HTML or CSS of any theme or widget. Support can direct you to the correct page to make changes or to reset the widget, page HTML or CSS to its default value. This will undo any customization that may be in place. Before you create or modify a theme using HTML and CSS it is suggested to have a backup handy.
While theme modification is outside what support is allowed to assist with, if you need assistance with making modification to the theme, our implementation department is available to make these modification at an hour rate. If the service is ever needed please let us know and we will get that process started for you. Or check out our new Theme Store to find a theme that suits your needs.


